Regardless of the size or condition of your deck there are some basic steps you should always follow to ensure your deck looks the best it can:
1. ASSESS
Before even preparing to stain, you need to check on the condition of your wood and make sure you know the right steps to take before staining.
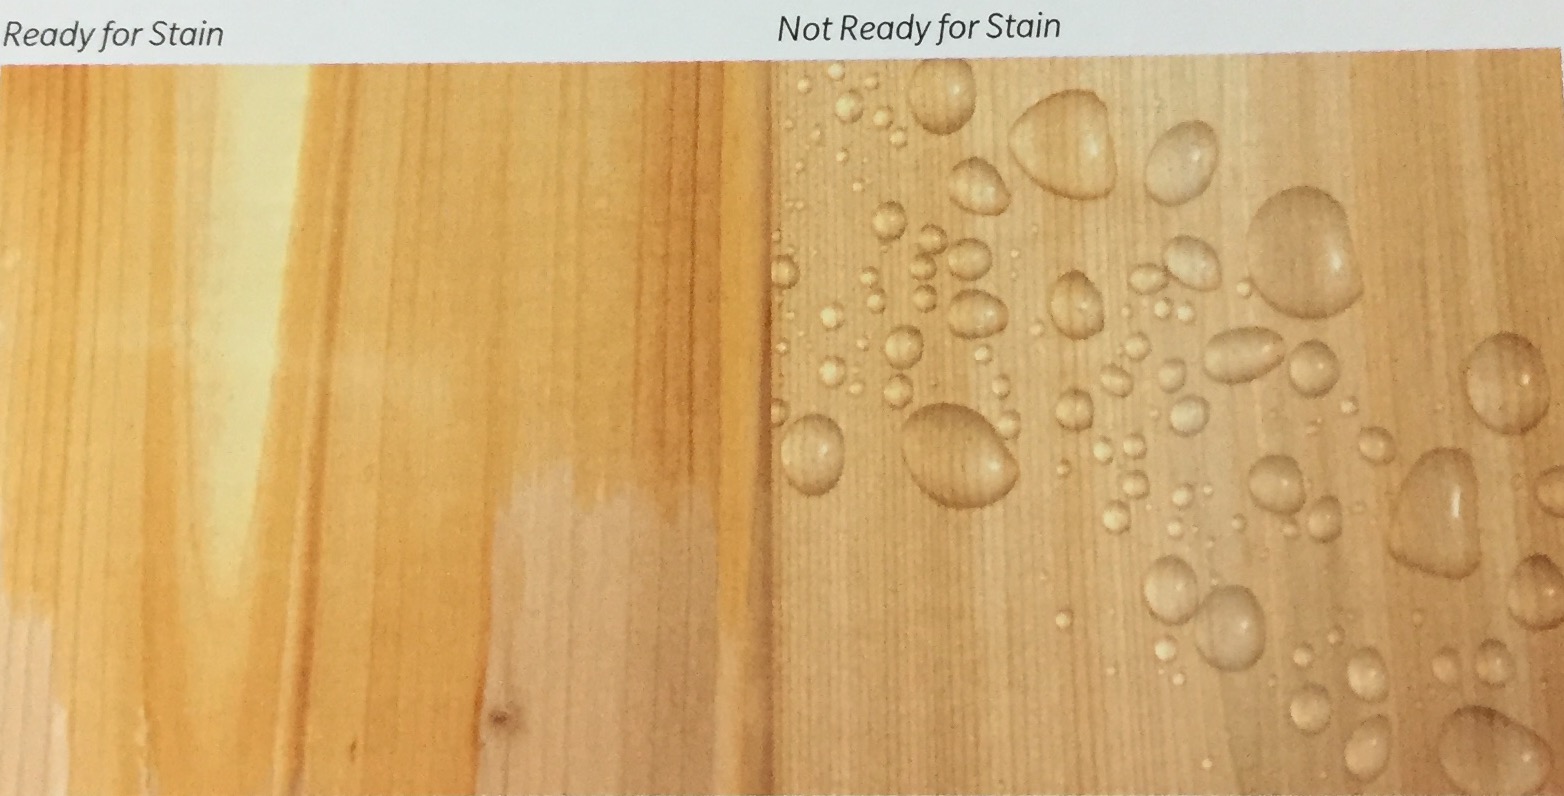
-New Wood
If you have a newly constructed deck it may not be ready for staining right away. Sometimes in the lumber milling process they treat the wood with a “glaze” that could prevent stain penetration. To see if your new wood is ready for stain, sprinkle some water on it. If it soaks into the wood then your wood is ready for stain! If it beads up then the protective coating is still on the wood and must be removed with a light sanding. After you sand make sure to sprinkle more water onto the wood to see if it soaks in.
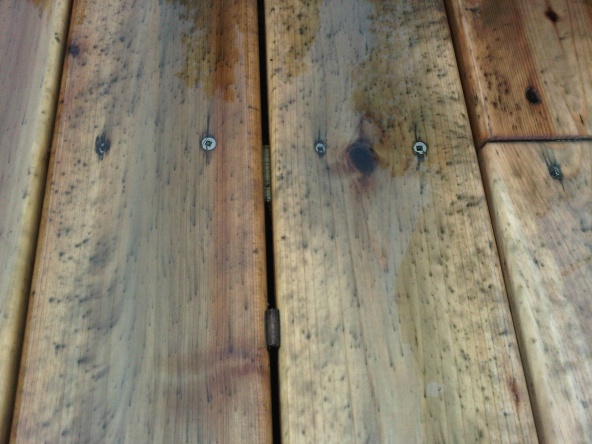
-Mold & Mildew
Your deck may have some telltale signs of mold or mildew that aren’t obvious. Some things to look for are small black spots or greenish/black fuzzy spots.
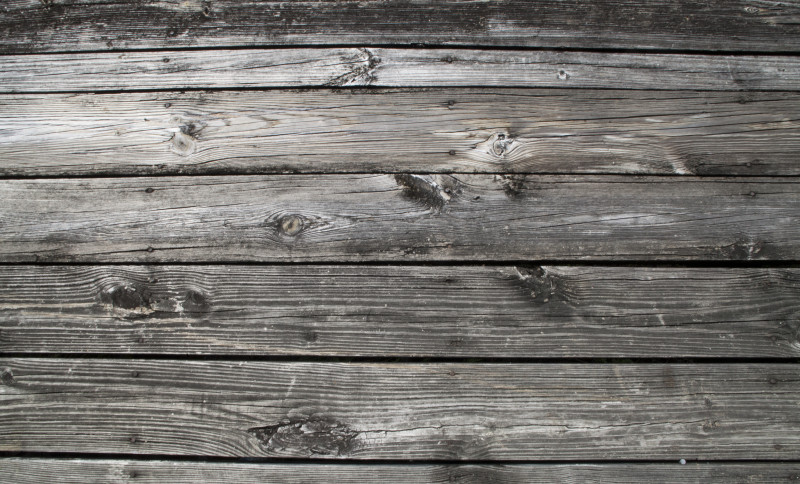
-Weathering/UV Damage
Wood that is damaged from the sun or weather is usually gray or silver in color. It may also feel soft or flakey when pushed on with your fingernail.
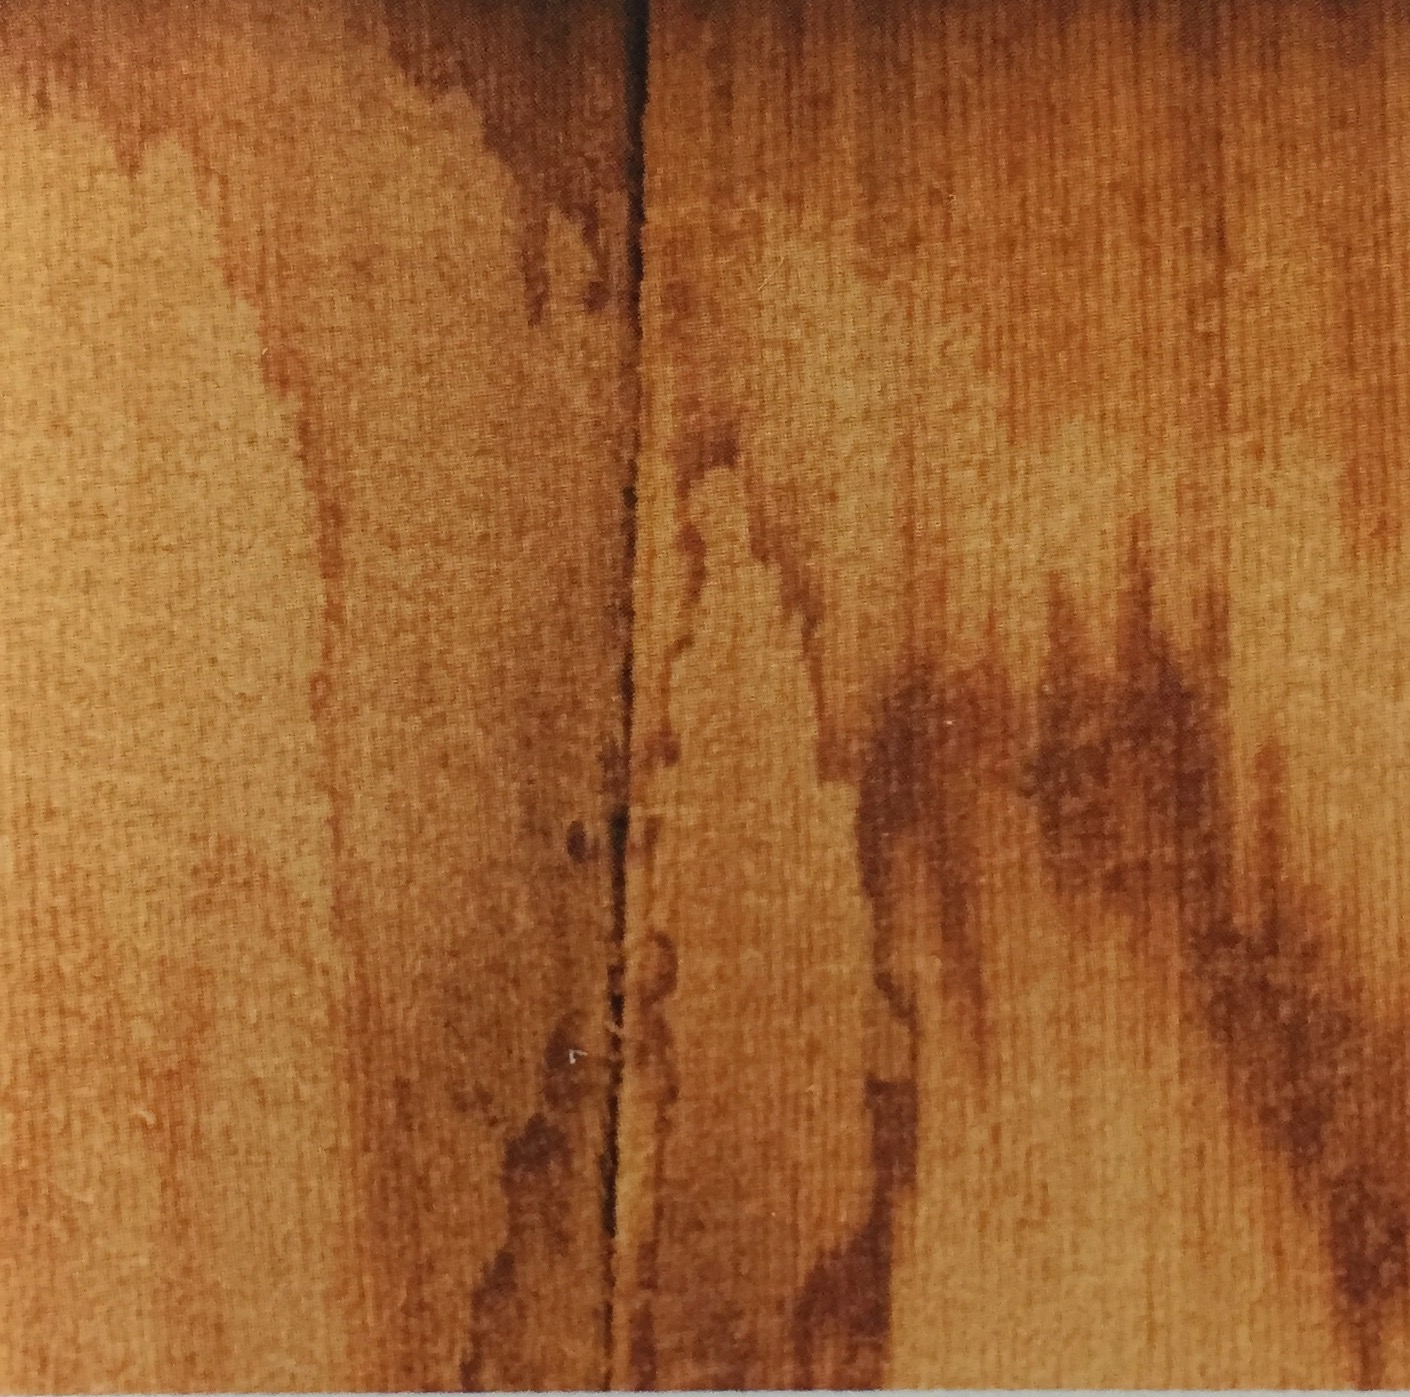
-Tannin Bleed
Tannin bleed results in reddish-brown stains on the wood. These are caused by moisture bringing the natural acids in the wood to the surface.
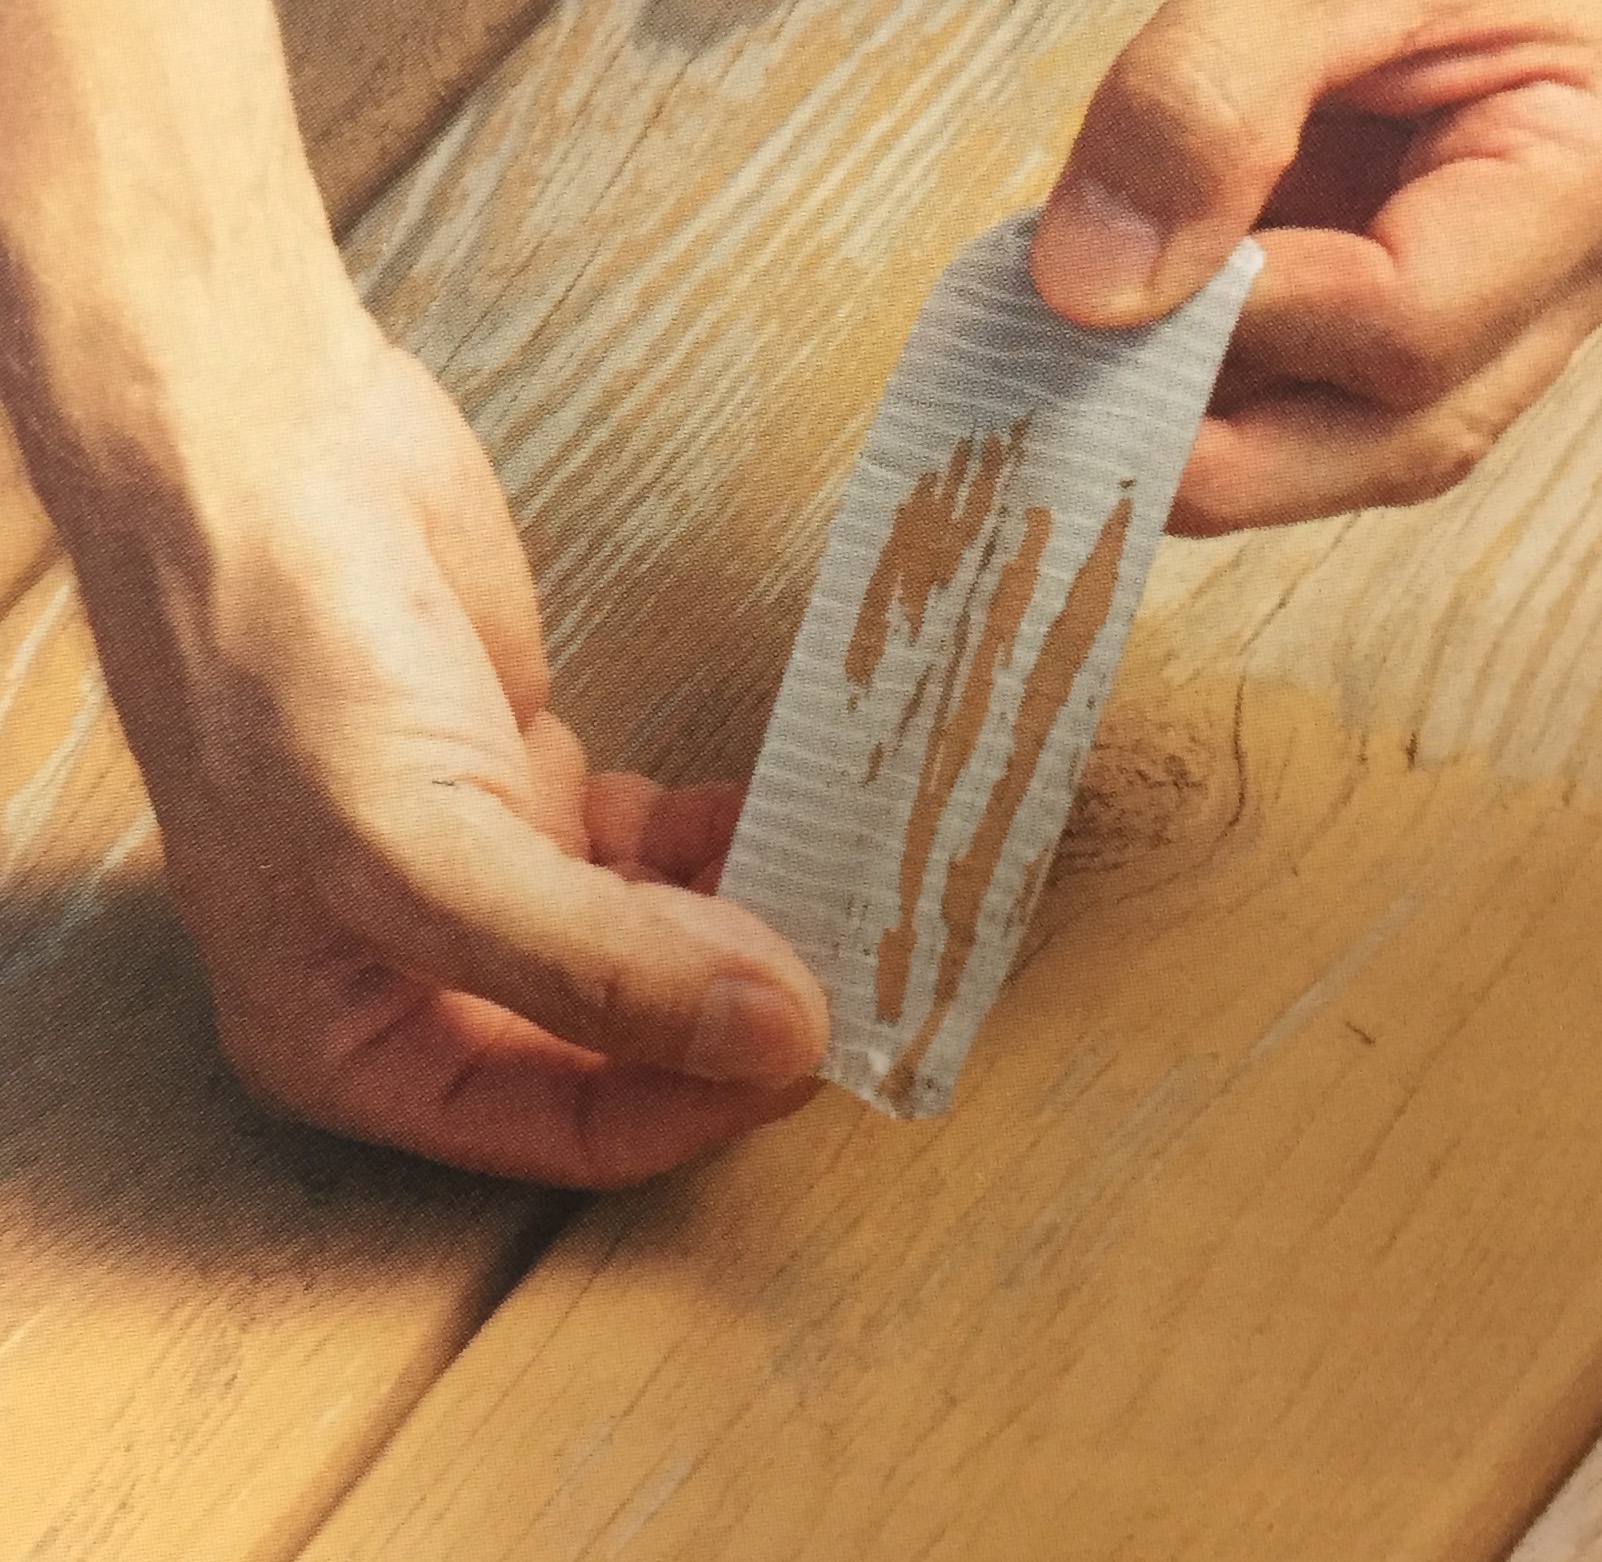
-Peeling
Old coatings will sometimes fail and start peeling. These must be removed before applying new stain. To see if old coatings are failing and at risk of peeling, put some tape on the surface and pull it off. If pieces of the old coating come off on the tape then it is failing and will need to be removed before applying new stain.
2. PREP
Before doing any prep to the wood itself, make sure that you make any repairs to the deck that need to be done. Replace or secure loose boards, drive in screws that have come loose, and sand down any rough areas. Also be sure to cover any nearby plants or landscaping and remove any furniture or hardware from the deck.
Next, choose a product (or products) to use to prep your wood based on what condition it is in.
-Wood Cleaner
Wood cleaner is your best bet when you have new wood, mold/algae, weathered wood, or tannin bleed. Simply power washing the wood or using a normal cleaner/soap is not enough to kill any mold/algae and renew the wood to a condition where it can be stained. We recommend using Flood Pro Series Wood Cleaner.
-Wood Stripper
If your deck is peeling or you have previous coatings still on the wood, you should use a wood stripper. This will get any old products off of the wood and make sure you get the best penetration you can from the new stain you apply. Flood Pro Series Wood Stripper is an excellent option. After you use the wood stripper, be sure to follow with a wood cleaner to remove any remnants of the stripper and other things that may interfere with the new stain.
| Wood Condition | Cleaner | Stripper |
| New Wood | X | |
| Mold/Mildew/Algae | X | |
| Weathered/UV Damage | X | |
| Tannin Bleed | X | |
| Peeling/Failing/Previous Coatings | X | X |
3. STAIN
When selecting a stain for your deck, take into consideration the condition of your wood, how much wood grain you want to show, and the amount of sun exposure the surface gets. If you’re looking to cover up the wood to hide the grain and any imperfections in it, a solid stain is the way to go. Semi-solid, semi-transparent, and other stains will progressively show more wood grain. Look here to see some of the stain options we have at Moore Innovations.
When applying your stain be sure to use a high quality brush or paint pad for best results. If you decide to use a sprayer, you should back-brush (use a brush to go over what you sprayed) to get the best look. Stain vertical surfaces first, moving from top to bottom, so you can easily cover up drips and runs. After that, start on one end of your deck and work your way to the other, making sure to not stain yourself into a corner. Stain only one to two boards at a time and finish the whole board before moving on to another. Once you’re finished staining everything, be sure to allow the deck to dry at least 24 hours before putting furniture back on it and using it heavily.
While these basic steps will work for almost all decks, each deck is a unique project and may require slightly different steps. Contact us for expert advice on what is needed for your project.


